
Deploying Django on AWS EC2 and Docker
If you are here, you are probably looking to deploy a Django project using AWS EC2 and docker without an orchestrator (ECS, EKS, or Docker Swarm – don’t use swarm), you are at the right place.
PS: I’d still recommend using Kubernetes or at least ECS in the longer run!
Let’s get started 🤪
This post assumes that you are familiar with AWS basic operations, such as spinning up an EC2 instance or other services and attaching a security group with relevant inbound and outbound traffic.
Most resources selected are eligible under the free tier, and I’m not attaching a screenshot of every other screen on the AWS console; instead, just mentioning the steps.
Instead of installing docker-engine in EC2 every time, let’s create a Docker AMI:
- Launch Amazon Linux 2 EC2 instance.
- Set-up docker AMI: Install Docker Engine and Docker Compose; enable and start docker service at AMI boot time.
Launch Amazon Linux 2 EC2 instance:
- Select Region: Typically, a region closest to you.
- Select AMI: Amazon Linux 2 AMI (HVM) – Kernel 5.10, SSD Volume Type (Free tier).
- EC2 Family: t2.micro (Free tier).
- Configure instance: Choose the appropriate VPC and subnet (leave it to default subnet if you aren’t sure) and leave the user-data blank.
- Add your IP address for SSH inbound traffic in the security group and use a wild card 0.0.0.0 (not recommended).
- Download the RSA keypair .pem file.
Set-up docker AMI:
- Login into remote EC2 instance using the ssh:
ssh -i <ec2-keypair>.pem ec2-user@<ec2-public-ip-address>(don’t forget to set the right permission to the .pem file:chmod 0400 <ec2-keypair>.pem) - Install docker engine and docker-compose.
sudo yum update
sudo yum install docker
wget https://github.com/docker/compose/releases/latest/download/docker-compose-$(uname -s)-$(uname -m)
sudo mv docker-compose-$(uname -s)-$(uname -m) /usr/local/bin/docker-compose
sudo chmod -v +x /usr/local/bin/docker-compose
sudo systemctl enable docker.service
sudo systemctl start docker.service
sudo chmod 666 /var/run/docker.sock
Note: To run docker-compose without sudo: sudo usermod -aG docker $USER
Run the Django application on Docker + EC2:
- Launch an EC2 instance with docker pre-installed.
- Configure user data; to include environment variables and start-up script.
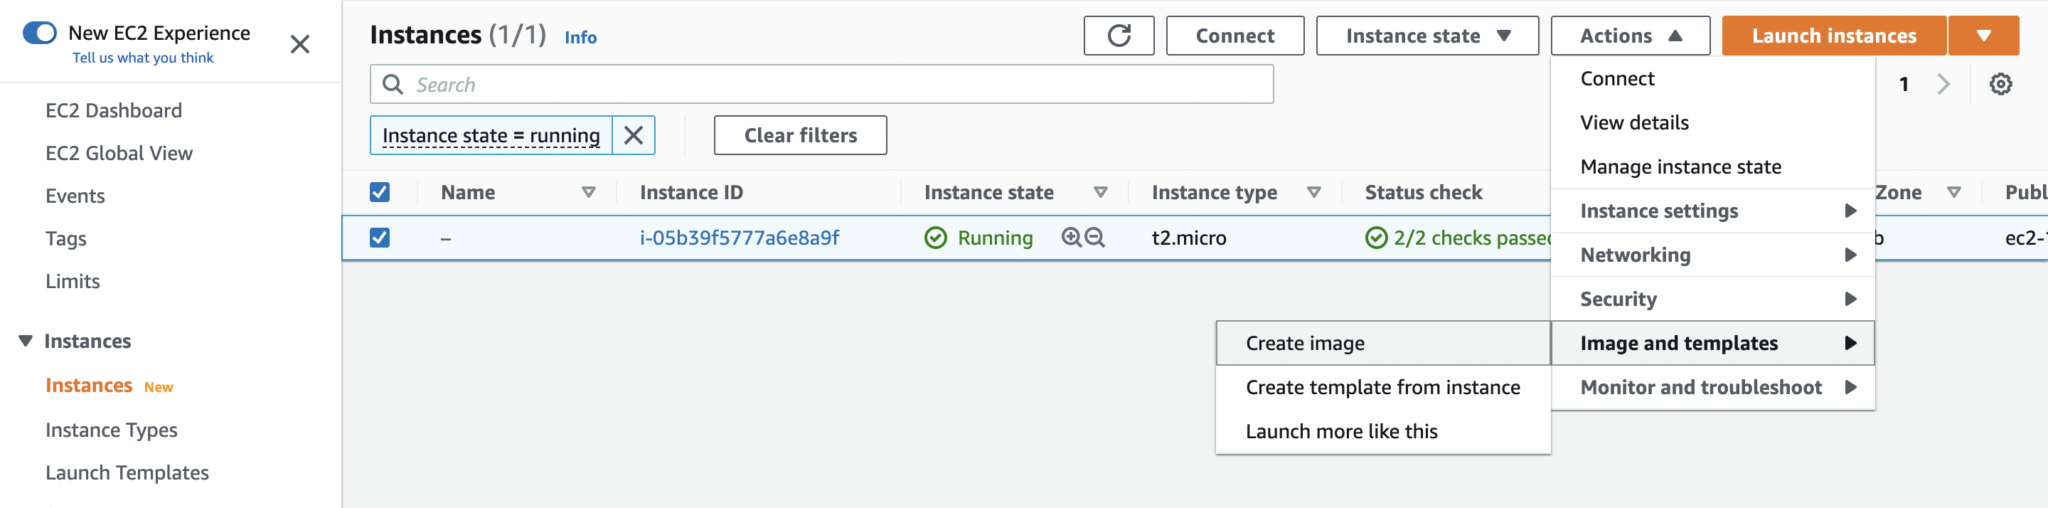
Figure 1: Create AMI from EC2 instance
Launch an EC2 instance with docker pre-installed:
- 👻 We are almost done! On the EC2 dashboard, select the EC2 instance, go to “actions > image and templates > create image” and give the AMI a name.
- Terminate and launch another EC2 instance (to test) from the new AMI (choose custom AMI while launching EC2 instance).
- In the configure section, the user-data area is as follows (using cloud-init):
Content-Type: multipart/mixed; boundary="//"
MIME-Version: 1.0

--//
Content-Type: text/cloud-config; charset="us-ascii"
MIME-Version: 1.0
Content-Transfer-Encoding: 7bit
Content-Disposition: attachment; filename="cloud-config.txt"

#cloud-config
runcmd:
 - echo "For the first boot"

cloud_final_modules:
- [scripts-user, always]

--//
Content-Type: text/x-shellscript; charset="us-ascii"
MIME-Version: 1.0
Content-Transfer-Encoding: 7bit
Content-Disposition: attachment; filename="userdata.txt"

#!/bin/sh
sudo chmod 666 /var/run/docker.sock
echo 'export DEBUG=False DATABASE_NAME=licensing DATABASE_USER=admin DATABASE_PASSWORD=xxxx HOST_ENDPOINT=rds-licensing.xxxx.ca-central-1.rds.amazonaws.com REDIS_LOCATION=redis://127.0.0.1:6379/' > ~/script.sh
chmod +x ~/script.sh
sudo cp ~/script.sh /etc/profile.d/script.sh
source /etc/profile
--//--
Note: The user data script shown above works on first-boot and re-boots/restarts.
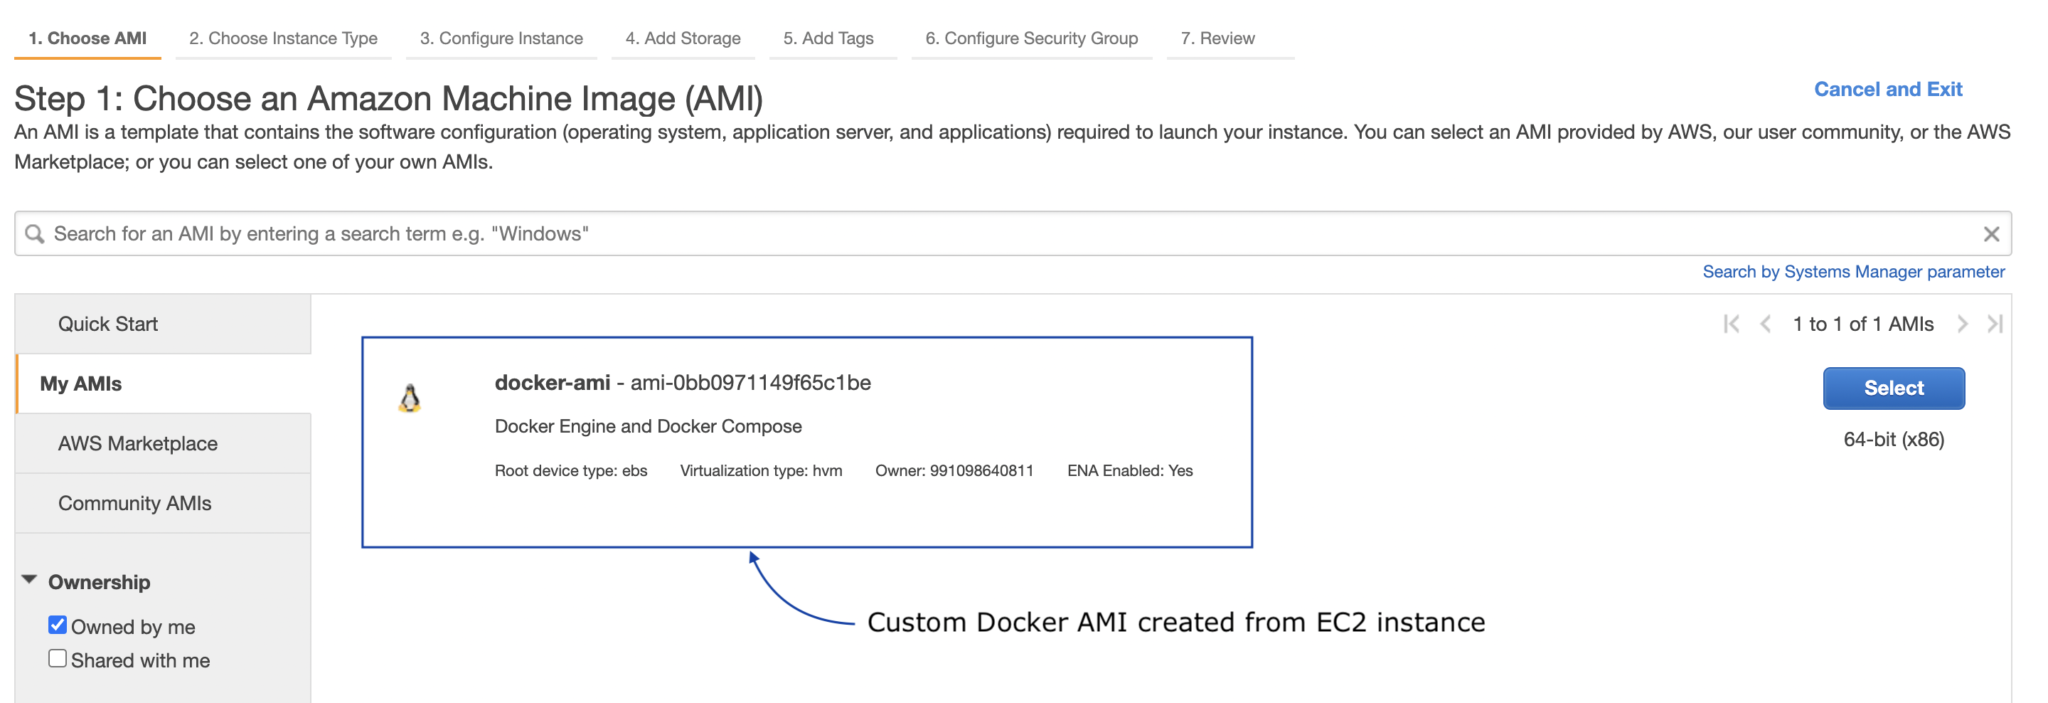
Figure 2: Launch EC2 instance from Custom Docker AMI
Note: A better practice is to save the user data in a file, convert it to base64.
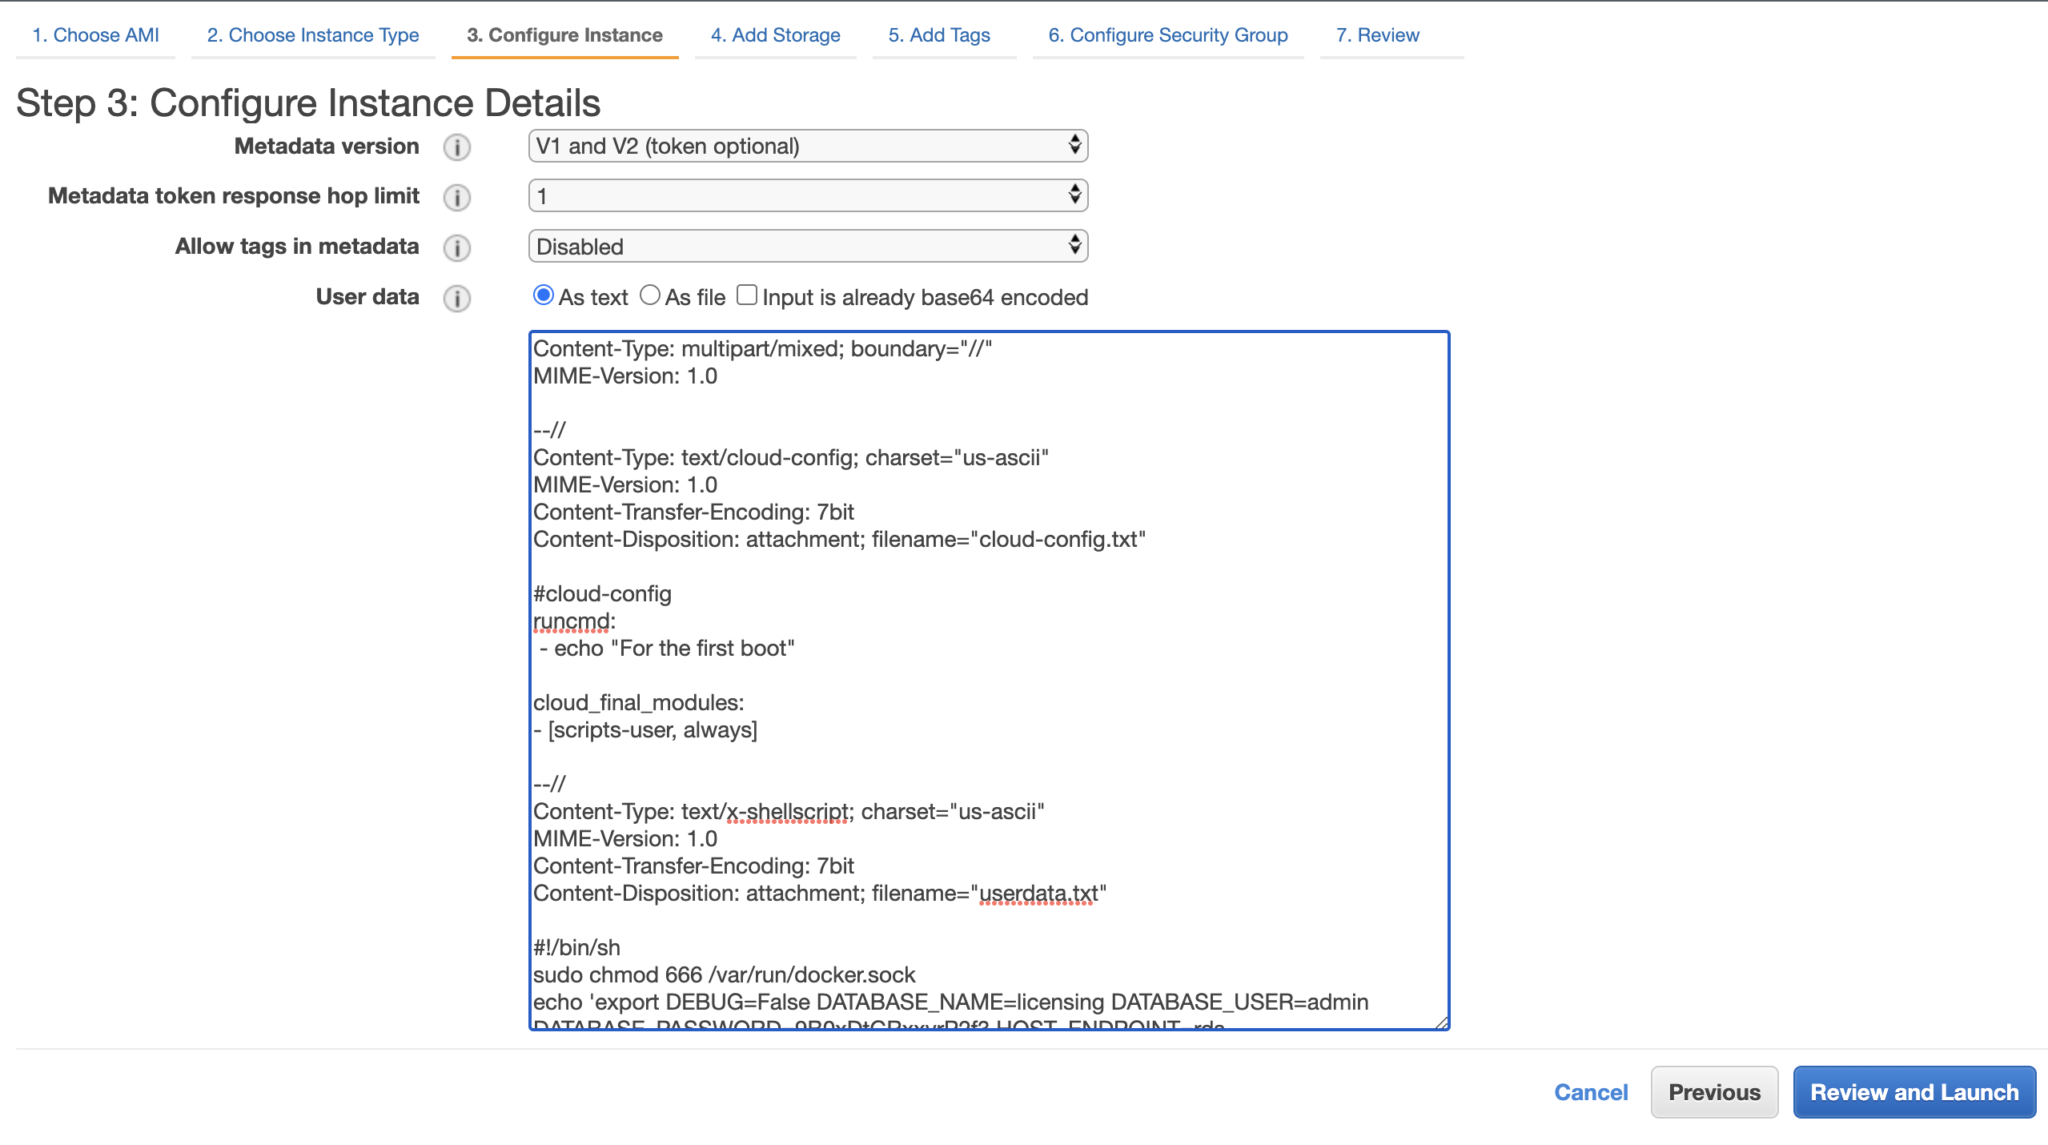
Figure 3: Set user data for EC2 instance (Docker AMI)
Last but not the least, in the user-data, include how’d want to get your docker-compose.yml file. If it’s git, include a git clone <repo>.git and docker-compose up

Figure 4: EC2 Security Group
The EC2 security group is configured to receive public traffic; typically, HTTP traffic would only be from the load balancer.
If you are following up with my prior post on dockerizing the Django application with MySQL database and Redis cache, here’s a quick set of steps to create RDS – MySQL.
Create MySQL Database:
- Choose a database creation method: Standard Create.
- Engine options: MySQL
- Edition: MySQL Community
- Version: MySQL 8.0.27
- Templates: Free Tier
- Settings: Fill in the database name, master username, and master password.
- DB instance class: db.t2.micro (Free tier)
- Storage: General Purpose SSD with 20 GB (20 GB is the minimum storage for RDS).
- Database authentication: Password authentication (Although not ideal, since the database is only accessible within the private network).
If the database set-up is not for production use, make sure to use free tier, disable auto-scaling, backups, enhanced monitoring, and multi-AZ, and don’t set the RDS to “public”; use it within the private network. Instead, attach the EC2 security group to RDS inbound rules at port 3306.
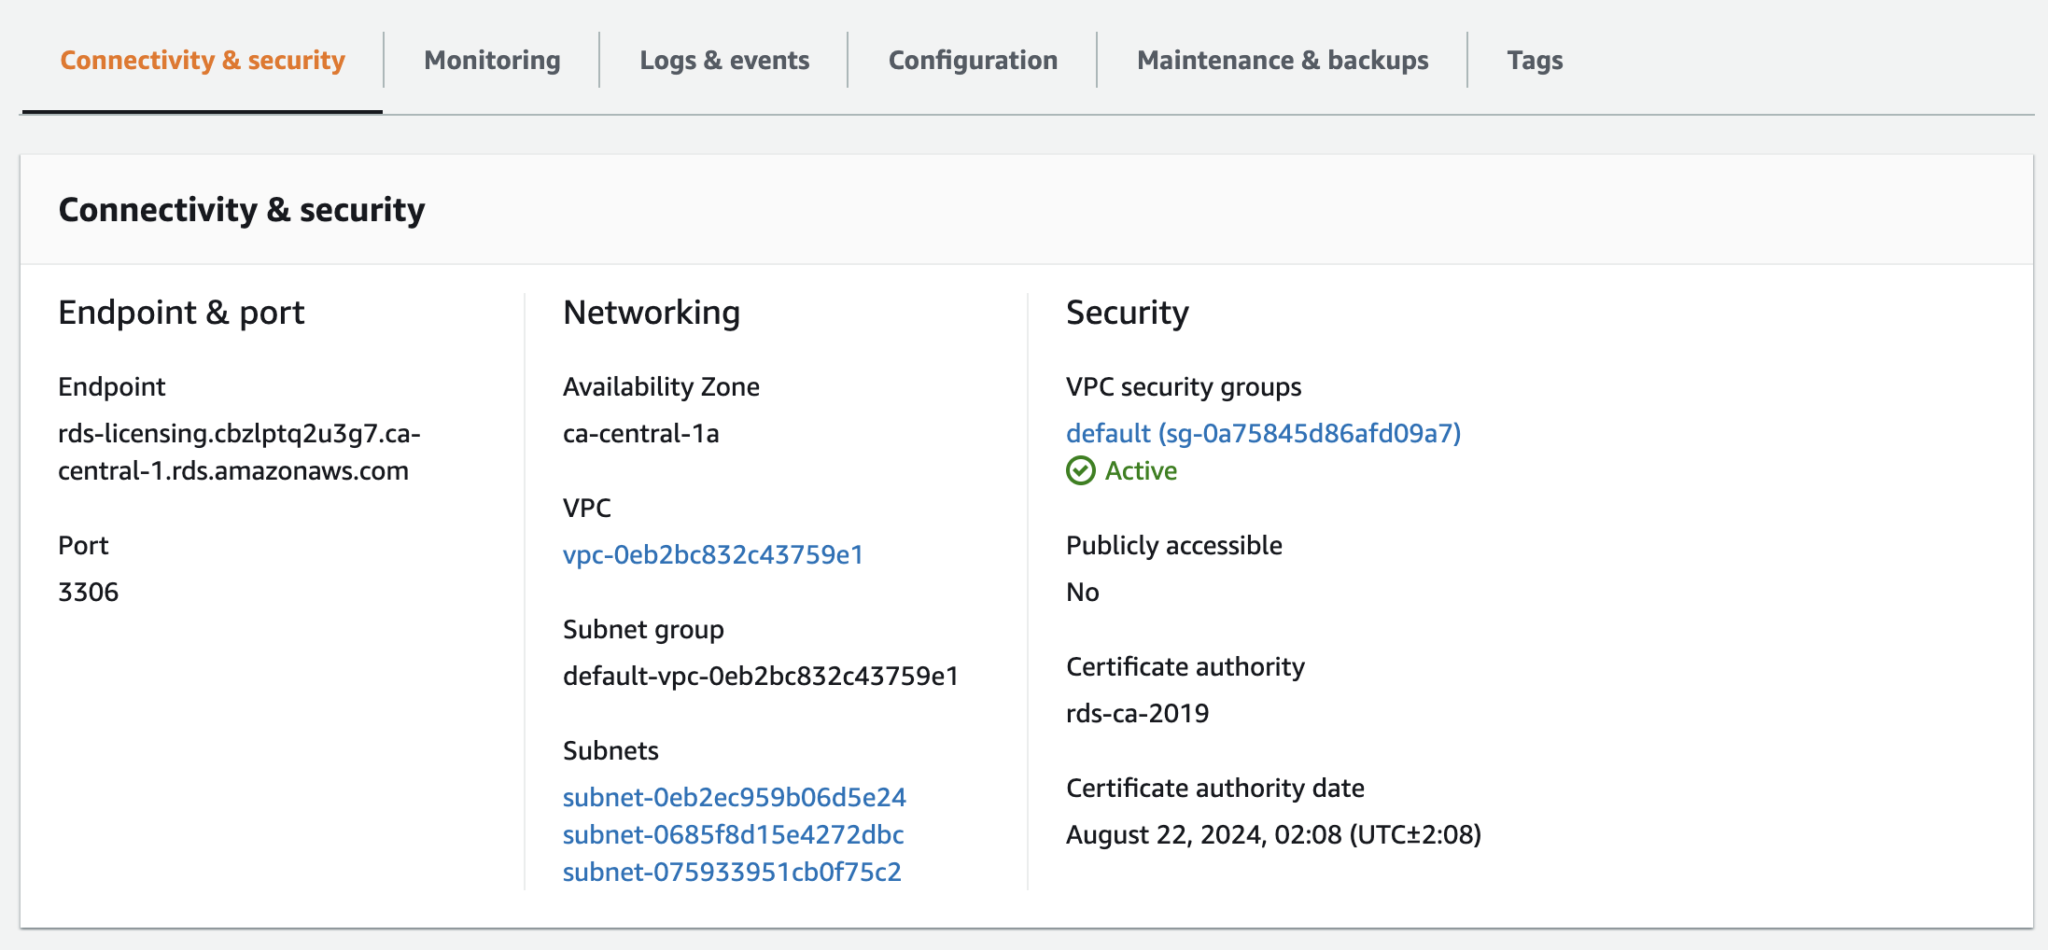
Figure 5: RDS Set-up in the private network
And yes 🗄 make sure RDS and EC2 are within the same VPC.
You are good to go 🚀
Don’t forget to update the hostnames and passwords in user data (env variables) and configure the security group EC2 instances.
Cite this article as: Adesh Nalpet Adimurthy. (Feb 17, 2022). Deploying Django on AWS EC2 and Docker. PyBlog. https://www.pyblog.xyz/django-on-ec2-docker
 #index